Collaborate to motivate
Overview
Outline
To provide teachers with a risk-free and safe learning space for them to improve how they interact with parents when a concern arises regarding the low attainment of their child. It provides teachers with the opportunity to think about how they respond.
Audience: High School/Secondary school teachers Responsibilities: Instructional Design, Action Mapping, Storyboarding, Visual Design, Mockups, eLearning Development
Tools Used: Articulate Storyline, Figma, Mindmeister, PowerPoint
Problem
A common problem presented to teachers by parents is a concern with their child’s low attainment and a struggle to motivate them to study at home. This results in parents embedding rewards and sanctions to try to motivate their child to study, however, extrinsic motivation strategies support some students to work effectively, but fail to motivate the majority to reach their full potential, as they need to be innately driven.
Solution
Students who are intrinsically motivated are more likely to reach their full potential as they will put more effort into their learning. Embedding intrinsic motivation strategies into the teaching in the classroom and at home by parents, can significantly improve student attainment. Teachers can collaborate with parents and inform them of effective intrinsic motivation strategies that can be used to support their child’s motivation towards their learning.
Process
Action mapping
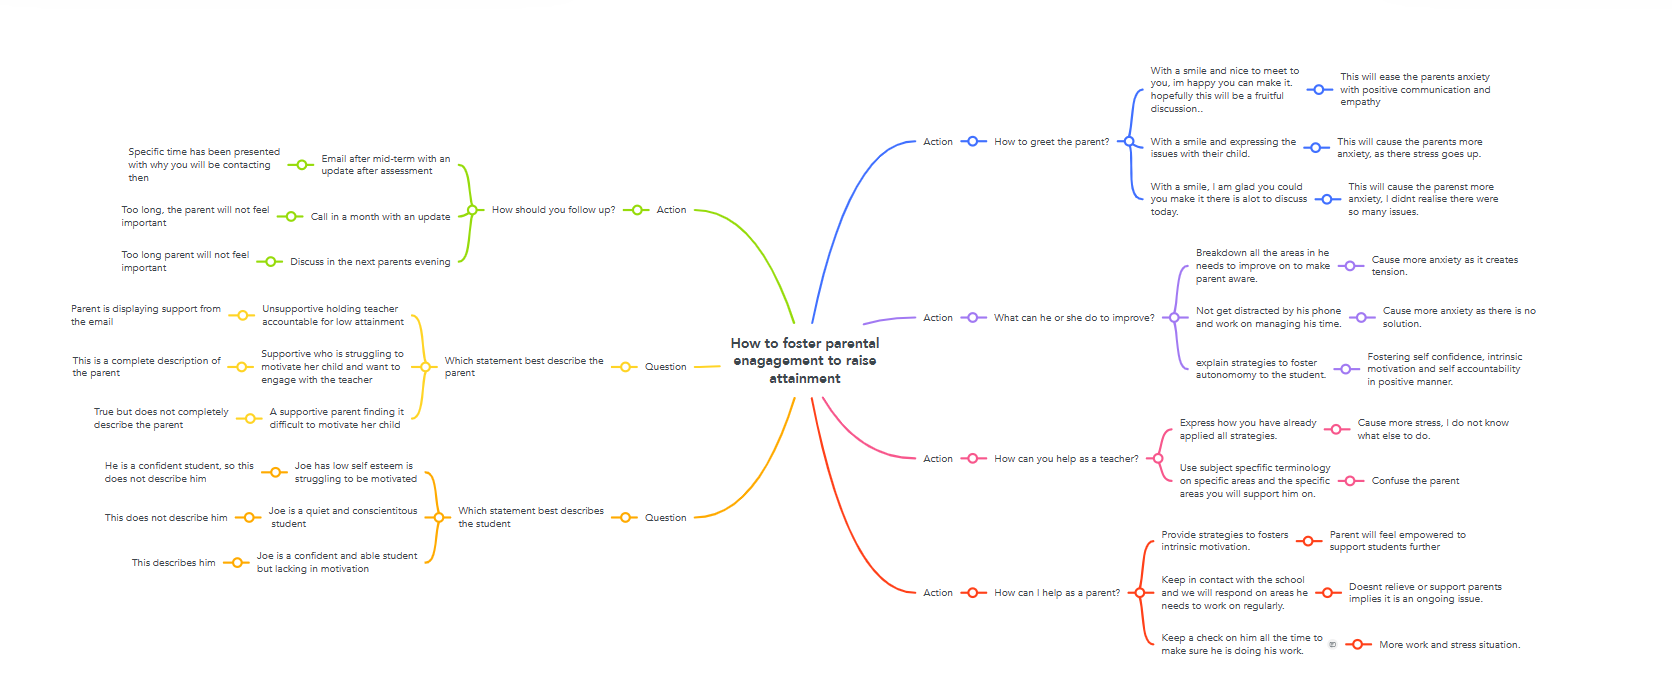
Action mapping is used as part of my design process, to correlate the needs of the clients with the needs of the learner, creating a meaningful and relevant learning experience. For this project, I acted as the subject matter expert (SME) and drew from my experience in teaching. To begin the action mapping process, objectives were set and these were related to events within the scenarios on “how the teacher should respond”, these were observable responses on how the learner would need to engage or avoid possible responses to help meet the overall performance goal.
Script
The action mapping was used as an outline for the story script and the responses the learner should and should not choose from. A synopsis for the story was created to provide a clearer picture of events that will occur to meet the overall objective of the course. Each character in the story was listed along with their function, allowing me to notice any duplicate roles. Each scene was noted with the context and visuals that would be needed to enhance the learning experience.
Storyboarding
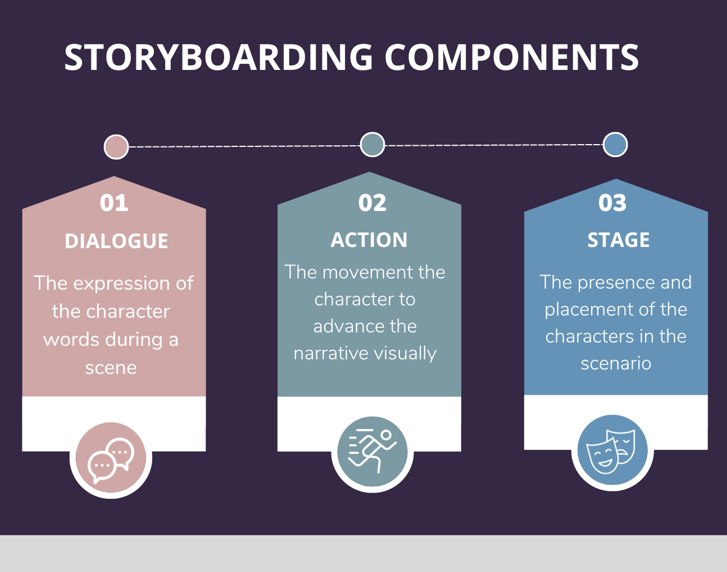
The learning design was drafted in the storyboard summarising each scene. Each scene was based upon, the envision of how it would appear, what will be happening and what must be done to complete the scene based upon the envision of the scene outlined in the script. As the learning design was scenario-driven, the storyboard focused on the observable responses in the action mapping relating it to the synopsis of the story using these three components:
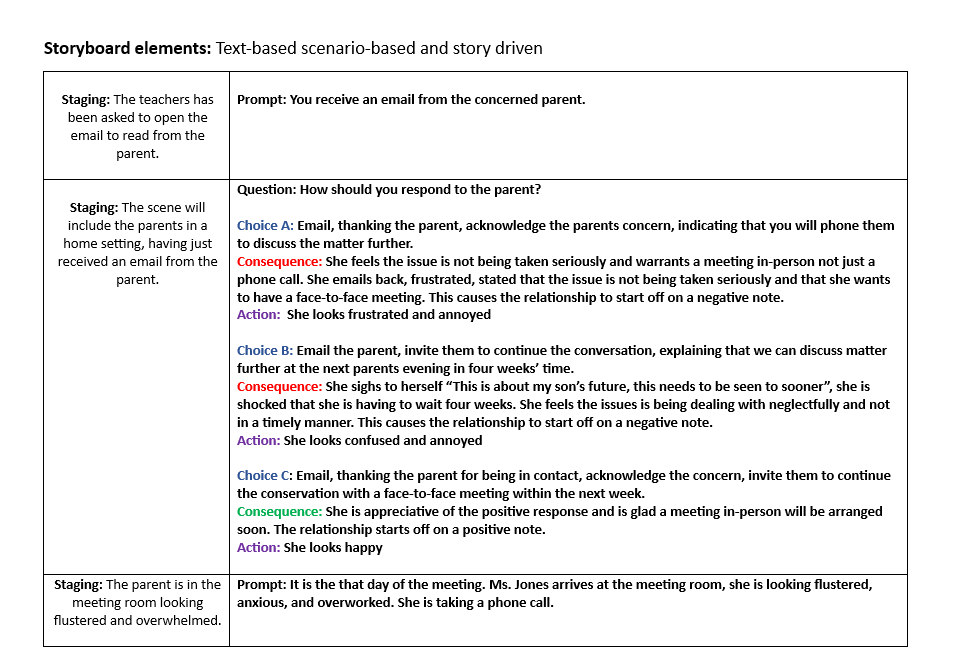
Additional components incorporated into the learning design included:
1. Learner feedback: The learner would receive feedback on correct and incorrect choices, they would be prompted to try again and be referred to areas that they could review again to help them to answer the question correctly.
2. Supporting the learner: A mentor was included throughout the course to support the learner answer questions and provide relevant information for the course.
The storyboard is presented to clients for feedback to prompt rework and revision. With the rework it is ensured that there was still continuity with the plot section.
Visual design
The visual design is significant for immersing the learner into the story. Visuals from different school settings were explored. Throughout the course, a variety of photography was used with a similar school setting, to engage and immerse the learners into a unified visual experience. To ensure that each slide visually aligned, colours were correlated using software in figma based upon the photo being used for each scene. Colours, formats of buttons and images were explored, so they aligned. Also, differing fonts and style for typography were used based upon the importance of the topic being conveyed within the learning. Headings and subheadings were formatted in a way that showed the importance in relation to each other, as well as in relation to the title and the body of the slide. The same format for typography was used throughout the course, for consistency. Below is an example of a visual chart created in figma, to formulate the design:
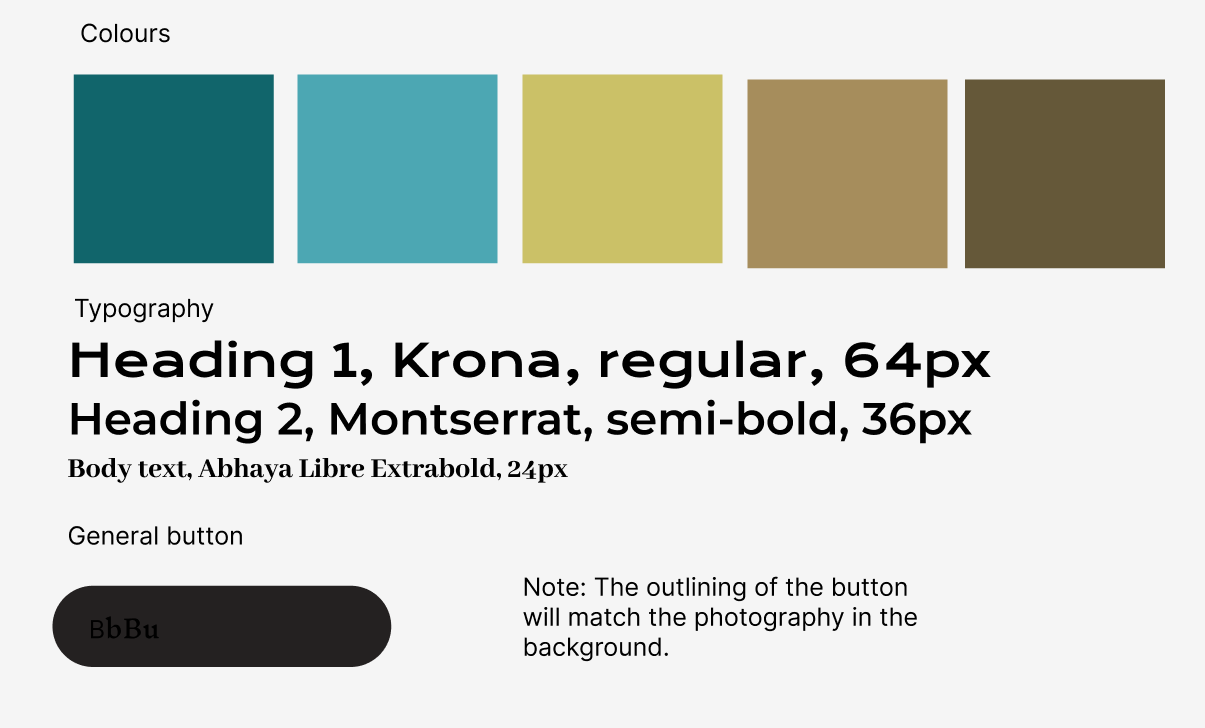
Furthermore, proportions were explored in figma based on what was important in the design and the element that I wanted the learner to focus on. A similar slide button was used throughout the course, again, for consistency. The buttons aligned with the background photography when hoovered over, keeping in theme with the staging, to immerse the user and make it visually appealing. Below is the image:
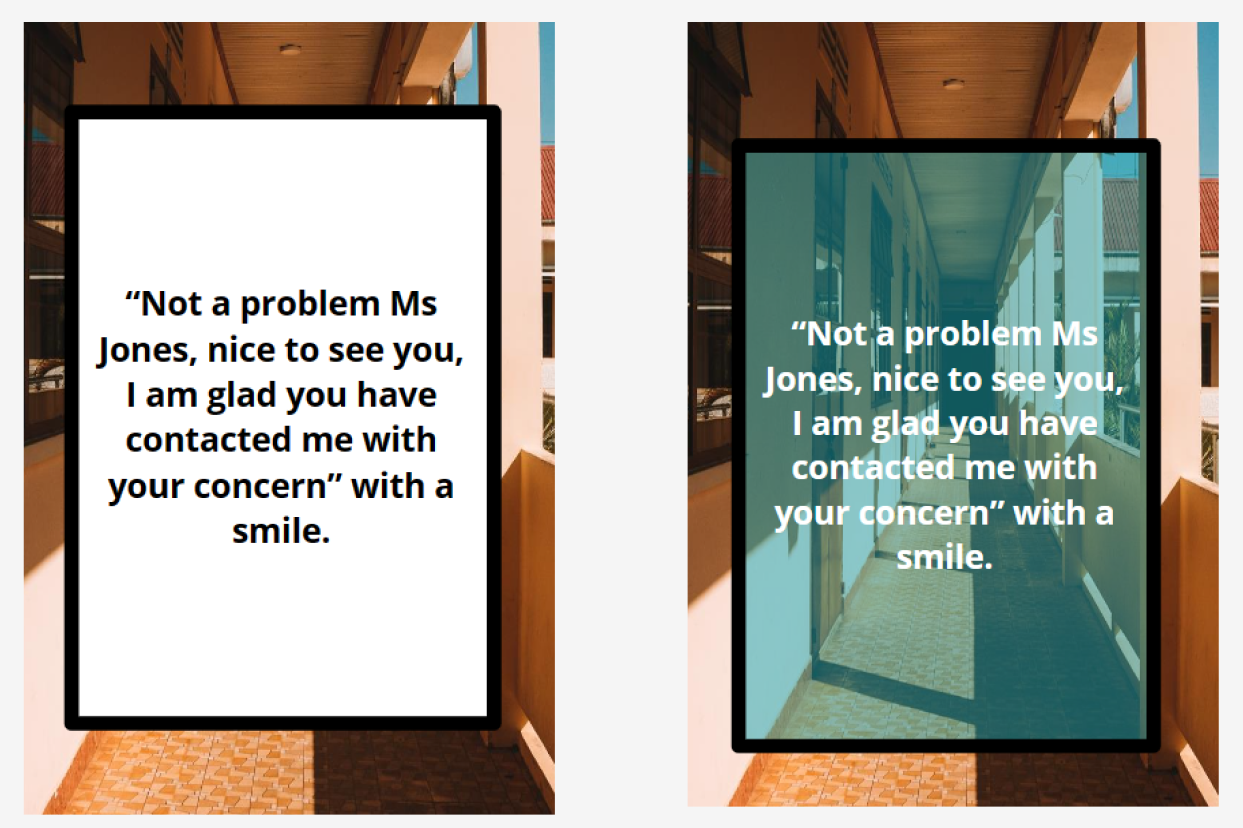
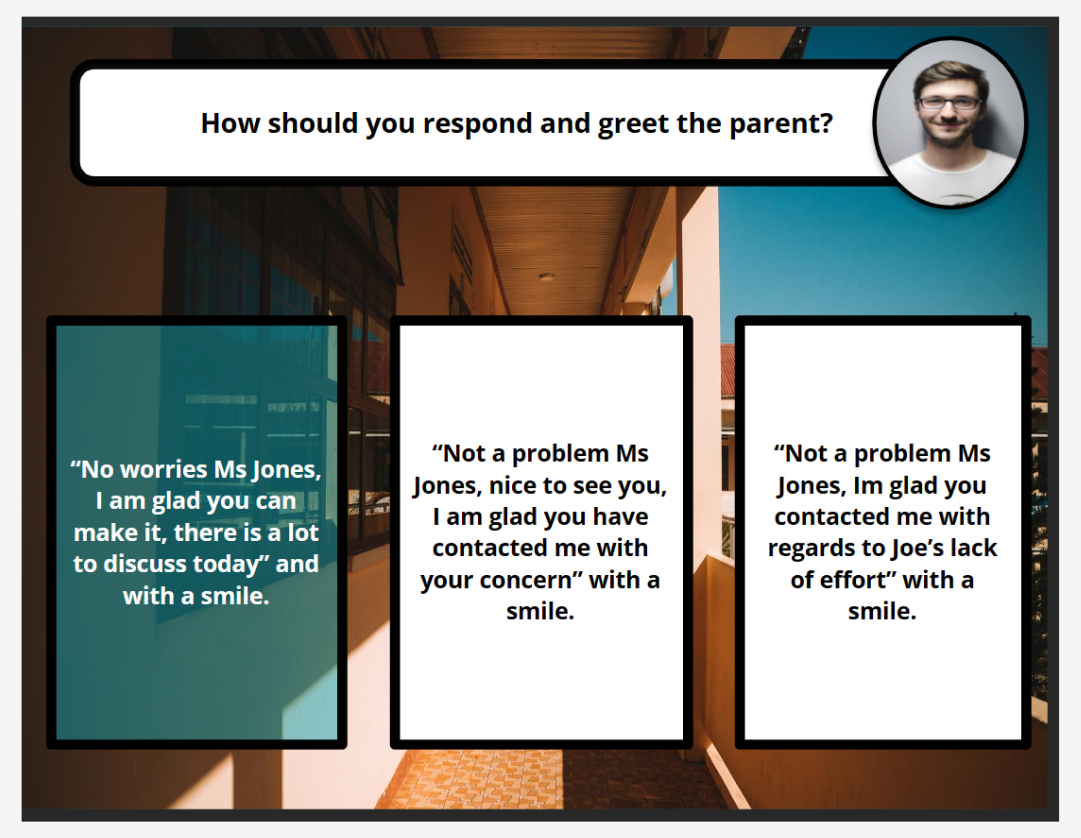
In reference to the buttons above, they were the key focal point of the slide; see the image below for the complete slide design, so the learner focused on reading through the answers and choosing the correct one. The other components to the slide, which included the question and mentor button were incorporated into the design with typography and colours that aligned with the design.
Prototype
Using Articulate Storyline 360, a prototype was developed to collect feedback on functionality and development. This included triggers, animation, sound, and a success meter. This was shared to gain feedback on the design and functionality.
Full development
The scenario-based slides were all developed in storyline360, all animations, sounds, visuals, and triggers succinctly correlated with each other. Furthermore, based on the feedback provided, changes were made to enhance the learning.
To experience the full project, click on the link.